Itero Instructions
Great Lakes can accept scans directly from iTero scanners. Please follow the instructions below to get started. If you have any questions, please contact:
Laboratory Customer Service
Phone: 800.828.7626 x 132
Email: [email protected]
• Log onto www.myaligntech.com to check for any iTero files
• Click on the blue hyperlink under code:

• Select “Export”:
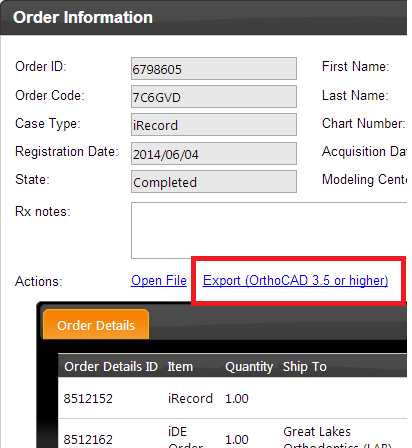
- Export Type will always be “Open Shell”
- Data Format will always be “File per Arch" (arches oriented in occlusion)
- Folder Name: leave the “code” that appears there and add the patient name in front of it as shown above
- “Export”

• “YES” open the exported files
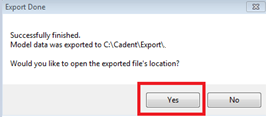
• Two .stl files will then be created
- These are the .stl files you will be uploading to the GLDT portal. Be sure to keep this computer folder open or save the .stl files to your desktop so you can easily find them to attach to your portal case.

• Using your credentials, login at https://upload.greatlakesortho.com
• First, you’ll need to make sure you have an electronic signature set up. (This is a one-time only task)
• Select “Electronic Signatures”
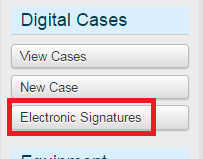
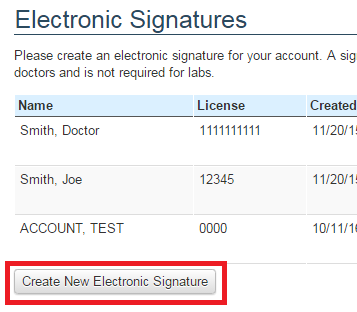
• If there isn’t already a signature for the Doctor you’re uploading a case for, select “Create New Electronic Signature”
- There should be a signature created for every Doctor in your office.
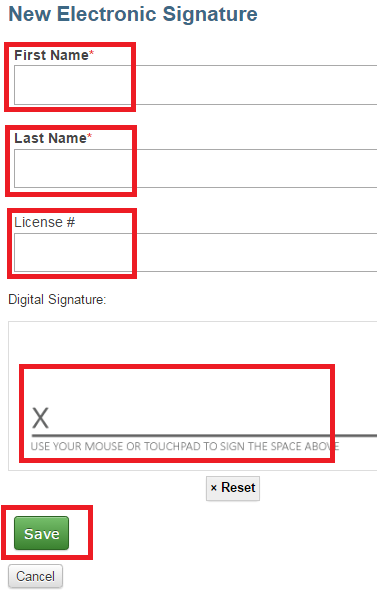
- Fill out all of the information and use your mouse to sign. Then select “Save”
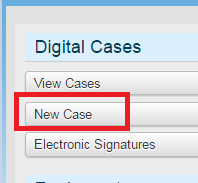
• Select “New Case”
-
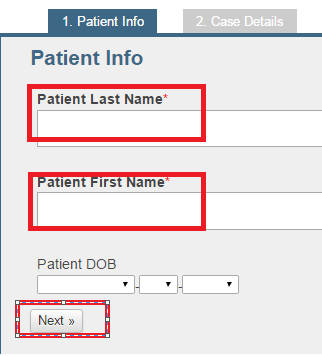
- 1. Patient Info:
- 1. Patient Info:
-
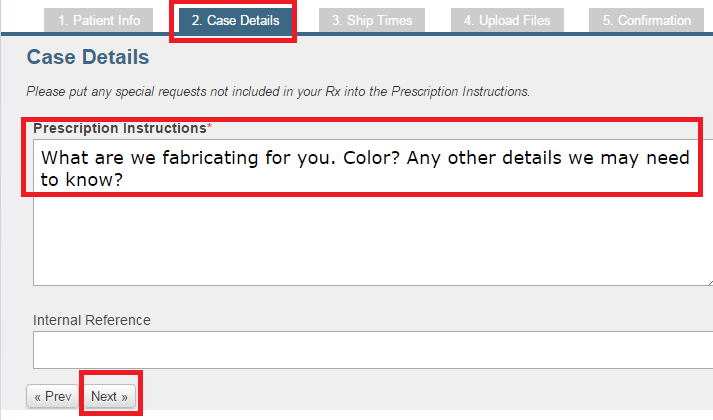
- 2. Case Details:
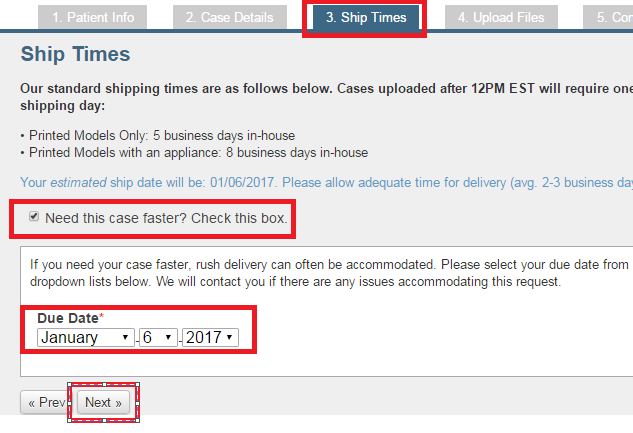
- 3. Ship Times:
- If you don’t yet have an appointment scheduled for your patient you can leave the default ship date as is and just select “Next.”
- If you need the case by a specific date, select “Need this case faster?” and you can select a specific delivery date.
- 4. Upload Files
- You can either highlight the files you exported earlier and drag them over or you can select “Add Files” and find the files on your desktop if you saved them there.
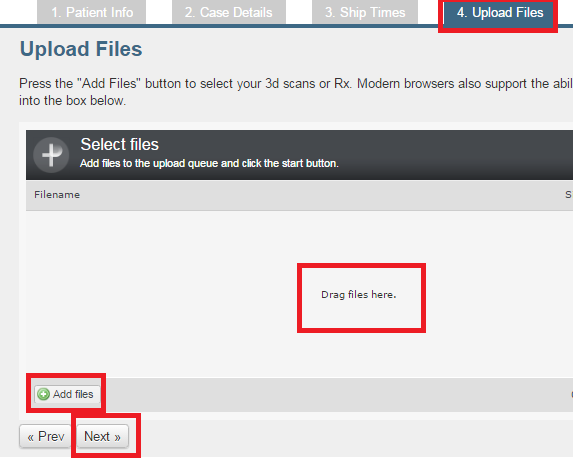
- You can either highlight the files you exported earlier and drag them over or you can select “Add Files” and find the files on your desktop if you saved them there.
- 5. Confirmation:
- Select the appropriate Doctor’s signature and “Save Case”
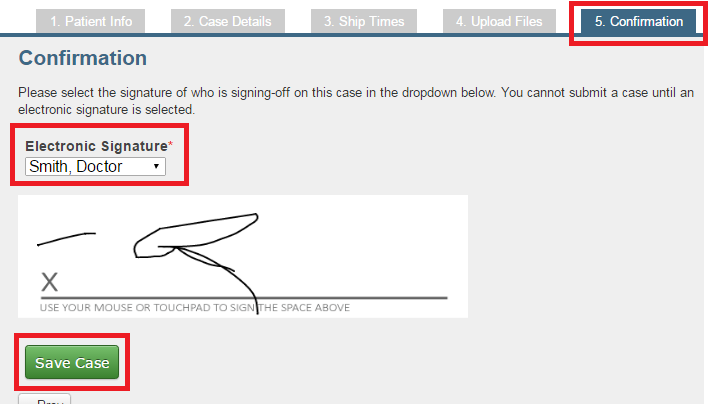
- Select the appropriate Doctor’s signature and “Save Case”
- 2. Case Details:
• One you hit “Save Case” you will begin to see the progress of the .stl files uploading.
• While the case is uploading, DO NOT move the mouse or navigate away from the page. This could cause the files to distort and cause a delay in the fabrication of the case.
- If this is the first case you will be sending to Great Lakes Dental Technologies, you will need to first add our lab to your list of labs drop down box.
- You can only do this if you have a business license.
- Call iTero 1-800-577-8767 and give them our ID# 10967
- Digital Bite:
- Scan the patient’s upper and lower arch, we will only print what we need for fabrication but use the occlusion in many cases to evaluate the appliance design. For the bite, scan this in the ‘fabrication position’ which should be set up prior to scanning as you would have when taking a wax bite to send to us with casts. Please be sure to remove any wax or bite material from the buccal surface of the teeth to be scanned so the surface of the teeth can be read by the scanner and orient the upper and lower arches correctly. Follow the appropriate position recommendations required for the appliance you are requesting. We will print that bite position and use this to mount the printed models.
- Examples:
- For a Splint:
- VDO minimum set at 1.5 mm from highest point of contact
- For a Sleep appliance:
- VDO open and advanced for the appliance you are ordering
- For a Splint:
- Examples:
- Scan the patient’s upper and lower arch, we will only print what we need for fabrication but use the occlusion in many cases to evaluate the appliance design. For the bite, scan this in the ‘fabrication position’ which should be set up prior to scanning as you would have when taking a wax bite to send to us with casts. Please be sure to remove any wax or bite material from the buccal surface of the teeth to be scanned so the surface of the teeth can be read by the scanner and orient the upper and lower arches correctly. Follow the appropriate position recommendations required for the appliance you are requesting. We will print that bite position and use this to mount the printed models.
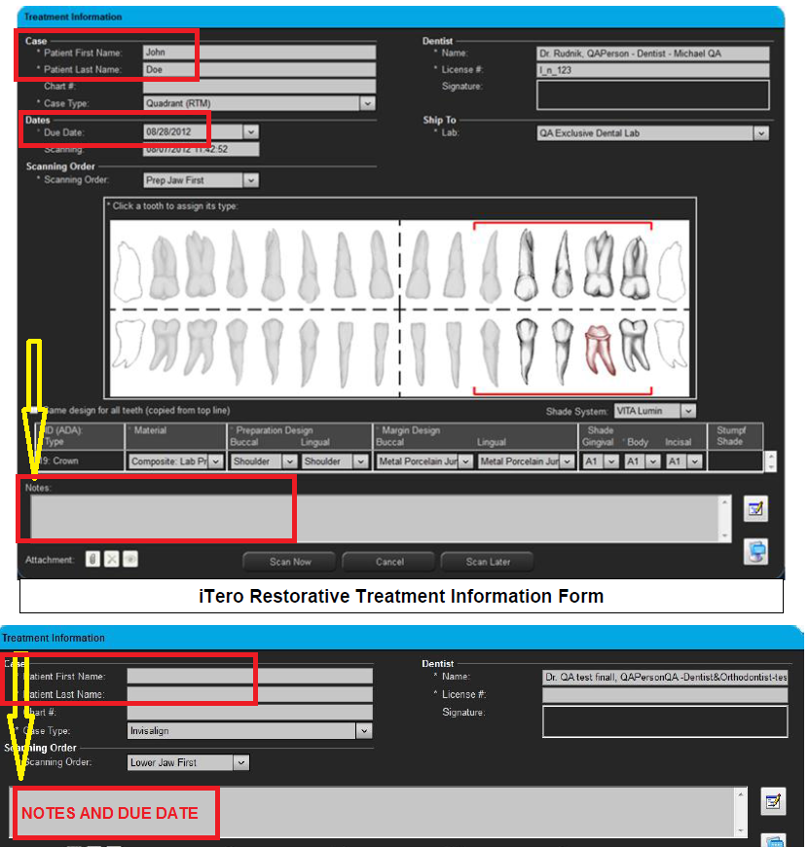
- You then need to fill out the case information similar to that of a prescription. Be sure to tell us the patient’s name and a due date.
- The “Notes Section” can be treated as your prescription in that you will tell us exactly what you want Great Lakes to fabricate. If you have a Master Rx on file, you can also write that number down here.
