Sirona (Cerec / Omnicam) Instructions
Great Lakes can accept scans directly from Sirona (Cerec / Omnicam) scanners. Please follow the instructions below to get started. If you have any questions, please contact:
Laboratory Customer Service
Phone: 800.828.7626 x 132
Email: [email protected]
- To send Great Lakes scans, you will need to have at least the 4.3 software and be a part of the Cerec Club
- If you need to update your software, or join the Cerec Club, contact Patterson Technology Center at 800.475.5036 so they can assist you
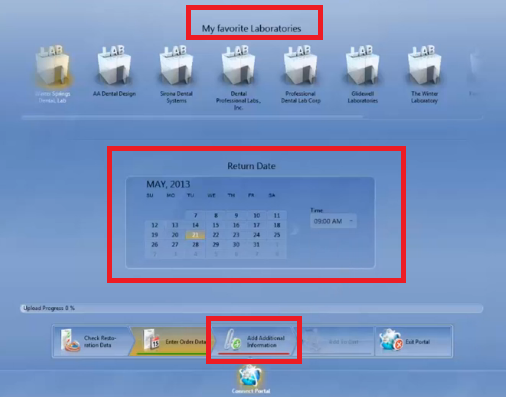
Adding Great Lakes Orthodontics to your Favorite Lab List:
- If you need to update your software, or join the Cerec Club, contact Patterson Technology Center at 800.475.5036 so they can assist you
- If this is the first case you will be sending, you will need to first add Great Lakes to your Favorite Lab list
- You will need to log into your Sirona Connect account
- You can find Great Lakes in the list of labs by searching via our zip code- 14150
- Once you add us, we will immediately be notified
Sending Great Lakes your scans: - Once you have connected with us as a Favorite Lab, you are ready to scan your patient
- Before you begin scanning, it is important to make sure your settings are where you need them to be
- Go to "Configurations"
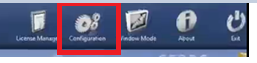
- Select "Settings"
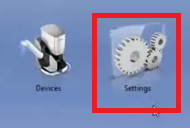
- Select "Seat Position"
- You need to tell the software where you actually physically scan the patient from because it affects the orientation of the camera
- For example, most Doctors will scan the upper arch from behind the patient in the 12 o'clock position and scan the lower arch from in front of the patient
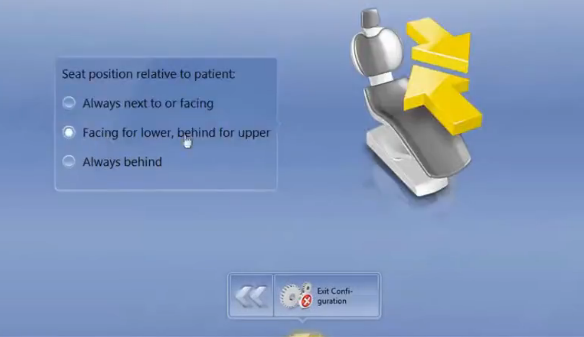
- For example, most Doctors will scan the upper arch from behind the patient in the 12 o'clock position and scan the lower arch from in front of the patient
- You need to tell the software where you actually physically scan the patient from because it affects the orientation of the camera
- Go to "Configurations"
- Before you begin scanning, it is important to make sure your settings are where you need them to be
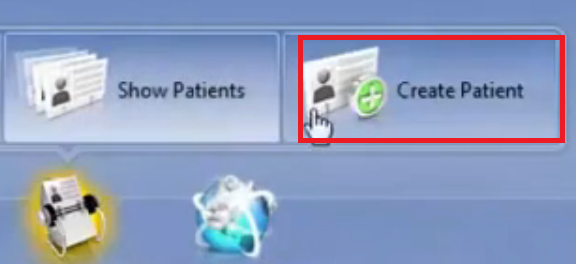
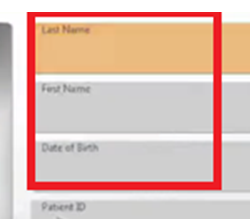
- Log in and "Create Patient"
- Fill out the Patient's Last Name and First Name
- Select "Create Scan"

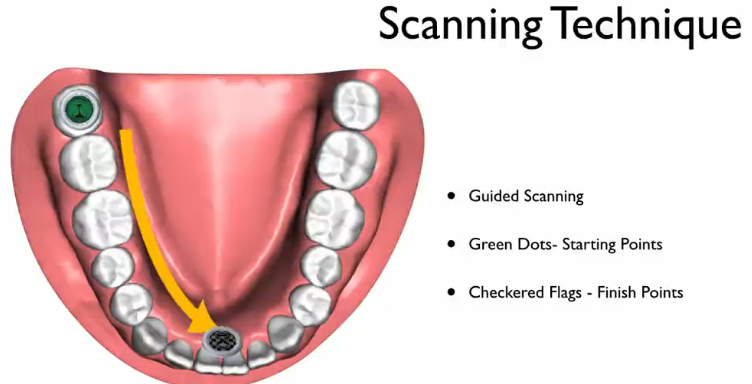
- You are now ready to scan with guidance
- You will need to scan the upper, lower and bite position.
- You will need to provide a vertical dimension of occlusion (VDO) appropriate for the appliance you need.
- 1.5mm from the highest point of contact for a splint, or open and advanced for sleep or functional appliances
- You will need to provide a vertical dimension of occlusion (VDO) appropriate for the appliance you need.
- Green dots are starting points
- Position over the molar and wait for three beeps to indicate you should begin your scan
- Follow the yellow line
- If you "fall off" you will be given a green point to start again
- If you "fall off" you will be given a green point to start again
- Once you get to the checkered flag, hold your position until you hear three beeps indicating you are done with that scan
- Follow the prompts to move forward to the next scan
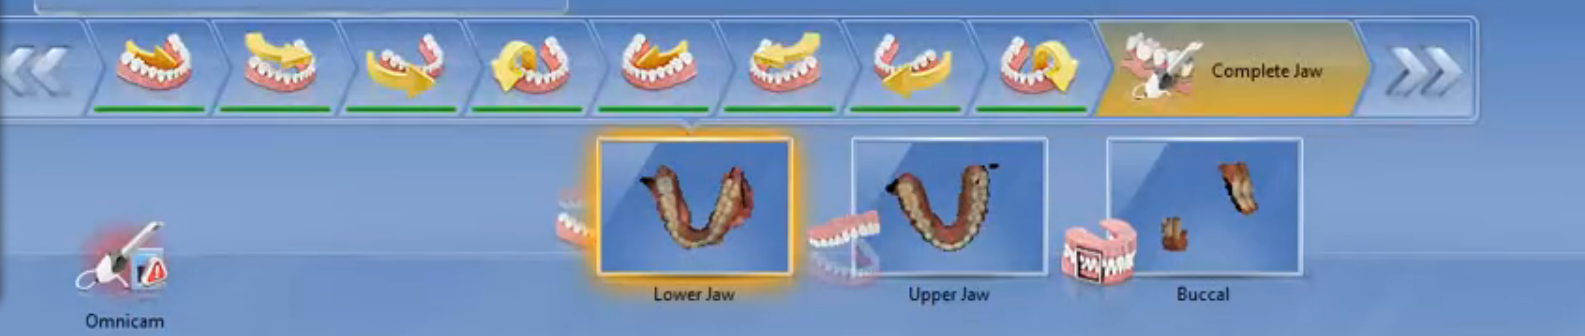
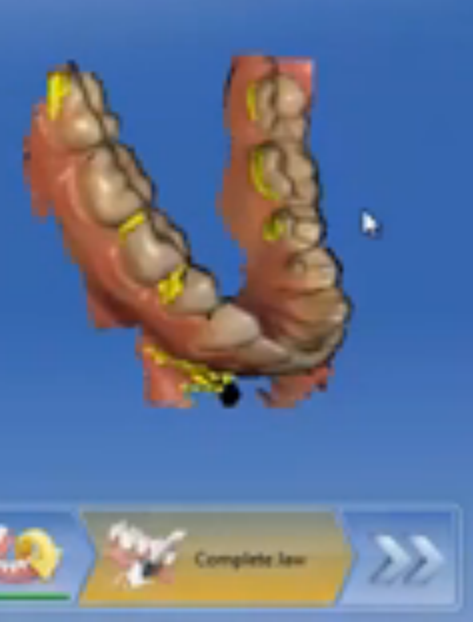
- "Complete Jaw" will show you (in yellow) areas that need to be filled-in
- Position over the molar and wait for three beeps to indicate you should begin your scan
- Once you're done scanning, you will go through the "Model Phase"
- "Set Model Axis" should not need to be adjusted because of the guided scan, but verify that it is correct
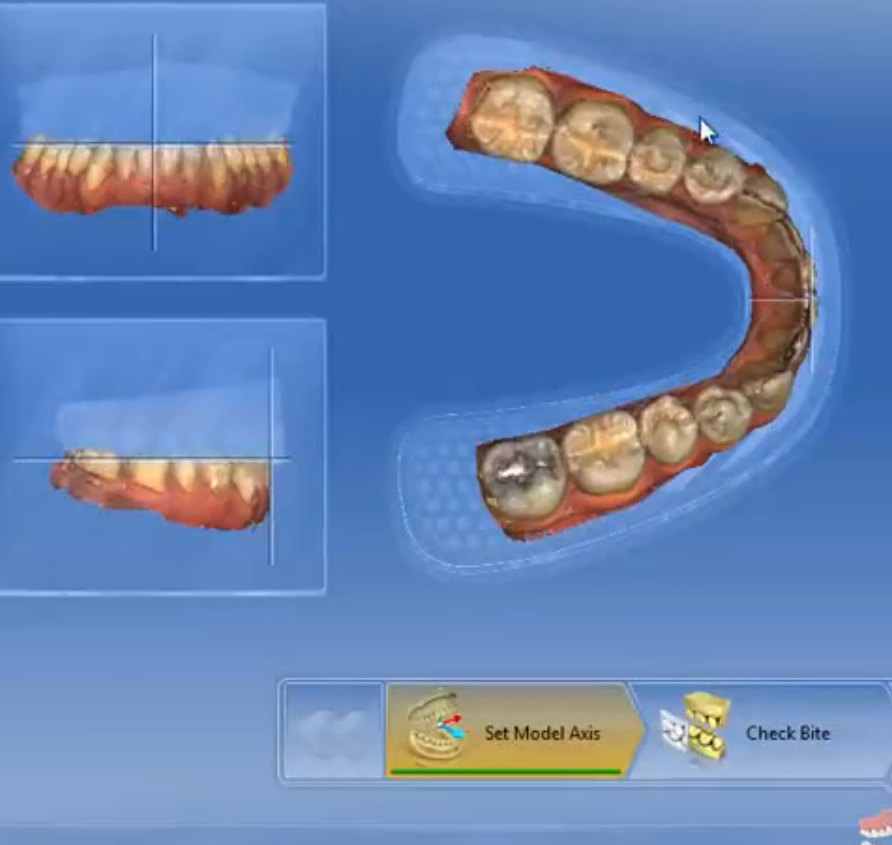
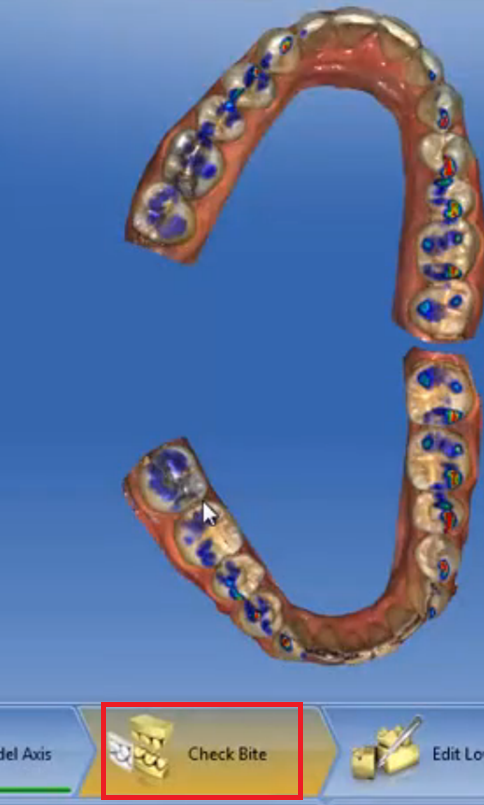
- "Check Bite" to make sure the double buccal bite has articulated your models correctly
- Digital Bite:
- Scan the patient’s upper and lower arch, we will only print what we need for fabrication but use the occlusion in many cases to evaluate the appliance design. For the bite, scan this in the ‘fabrication position’ which should be set up prior to scanning as you would have when taking a wax bite to send to us with casts. Please be sure to remove any wax or bite material from the buccal surface of the teeth to be scanned so the surface of the teeth can be read by the scanner and orient the upper and lower arches correctly. Follow the appropriate position recommendations required for the appliance you are requesting. We will print that bite position and use this to mount the printed models.
- Examples:
- For a Splint:
- VDO minimum set at 1.5 mm from highest point of contact
- For a Sleep appliance:
- VDO open and advanced for the appliance you are ordering
- For a Splint:
- Examples:
- Scan the patient’s upper and lower arch, we will only print what we need for fabrication but use the occlusion in many cases to evaluate the appliance design. For the bite, scan this in the ‘fabrication position’ which should be set up prior to scanning as you would have when taking a wax bite to send to us with casts. Please be sure to remove any wax or bite material from the buccal surface of the teeth to be scanned so the surface of the teeth can be read by the scanner and orient the upper and lower arches correctly. Follow the appropriate position recommendations required for the appliance you are requesting. We will print that bite position and use this to mount the printed models.
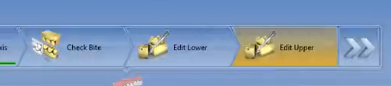
- "Edit Lower" and "Edit Upper" are for you to cut/trim any areas you do not think are necessary
- At this stage, again keep in mind, Great Lakes needs 1.5mm from highest point of contact for a splint or open, and advanced for sleep or functional appliances
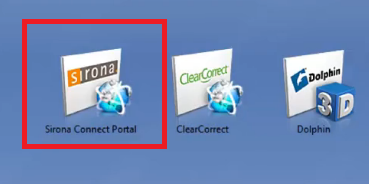
- "Export"

- Export to "Sirona Connect Portal"
- You may need to log in again
- You may need to log in again
- Connect
- Select your Lab from your Favorite lab list
- Select a Delivery Date
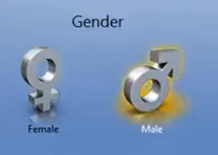
- Select Male or Female
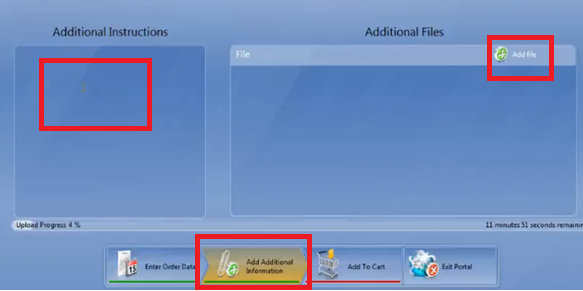
- Under "Additional Instructions" be sure to type in your appliance instructions
- This area can be treated as your prescription
- This area can be treated as your prescription
- You can also select "Add File" to upload any pictures, prescriptions, perio charts, etc.
- Before sending your case, you will see an “Anonymous” Box that MUST be unchecked. If this is checked, your patient’s name will not come over to Great Lakes
- Select "Add to Cart"
- Verify the information:
- Patient's name
- Lab you're sending the case to
- The delivery date
- Patient's name
- Once the upload is at 100% select "Submit Cart"
- Add your password
- Select "Submit"